


Vinyl flooring is a popular choice for homeowners due to its affordability, durability, and wide variety of styles. However, achieving a professional-looking vinyl flooring installation can feel daunting for DIY enthusiasts. Fear not! With the right preparation, knowledge, and a few handy tricks, you can transform your space with beautiful new vinyl floors.
This guide will equip you with the essential tips, tricks, and techniques to master vinyl flooring installation. Whether you’re a seasoned DIYer or a complete beginner, this information will empower you to tackle this project with confidence.
Planning for Success: Preparation is Key
Before diving into the installation process, proper planning is crucial for a smooth and successful outcome. Here’s what you’ll need to consider:
Choosing the Right Vinyl Flooring
- Consider your needs: Think about foot traffic, moisture exposure, and desired style. Luxury vinyl planks (LVP) offer excellent durability and water resistance, while vinyl tiles are perfect for high-traffic areas.
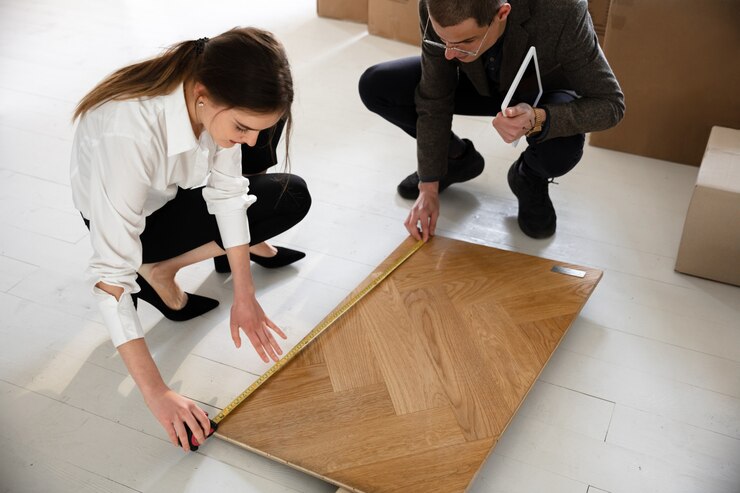
- Measure your space accurately: Don’t underestimate the importance of precise measurements. Factor in cuts and wastage when purchasing materials.
- Aaron’s Pro Tip: While at Aaron’s Painting and Remodeling, consult with our flooring specialists. They’ll help you choose the perfect vinyl flooring for your specific needs and budget.
Preparing the Subfloor
- Ensure a level surface: Uneven floors will telegraph through your vinyl planks, creating an uneven and unsightly finish. Use a leveling compound to address any dips or bumps.
- Remove existing flooring: Existing flooring materials like carpet or old vinyl need to be removed for proper installation.
- Clean and clear the subfloor: Sweep, vacuum, and remove any debris, dirt, or adhesive residue from the subfloor.
Gather the Necessary Tools
Having the right tools on hand will make the installation process much smoother. Here’s a basic list to get you started:
- Utility knife
- Tape measure
- Straightedge
- Rubber mallet
- Tapping block (optional)
- Jigsaw (for cutting around obstacles)
- Knee pads (for comfort!)
Mastering the Installation Process: Step-by-Step Guide
Now that you’re well-prepared, let’s delve into the installation process:
Acclimation is Key ️
Most vinyl flooring requires acclimation to the room temperature and humidity levels before installation. Follow the manufacturer’s instructions for proper acclimation times.
Layout and Planning
Before starting the installation, dry-lay the vinyl planks or tiles to visualize the layout and identify any potential cutting needs. This will help minimize waste and ensure a seamless final look.
Starting the Installation
- Begin in a corner: Most installations start in a corner furthest from the doorway. This allows you to make any necessary cuts along the least visible wall.
- Locking System: Most vinyl flooring features a click-lock system for easy installation. Follow the manufacturer’s instructions for snapping the planks or tiles together.
- Cutting Planks/Tiles: Use a sharp utility knife and straightedge for precise cuts. A tapping block can be helpful when tapping planks or tiles gently into place.
Transitions and Trims ✨
- Transitions: Use T-moldings or other transition strips to create smooth transitions between different flooring types or doorways.
- Trims: Install quarter-round molding along the baseboards to provide a finished look and conceal any expansion gaps.
Pro Tips and Tricks for Flawless Vinyl Flooring Installation
- Work methodically: Take your time and ensure each plank or tile is secure before moving on.
- Utilize spacers: Use spacers along the wall to maintain a consistent gap for expansion.
- Don’t force the fit: If a plank or tile isn’t fitting easily, check for any obstructions or misalignment.
- Clean up as you go: Wipe away any excess adhesive or debris to prevent them from getting trapped under the flooring.
- Aaron’s Secret Weapon: Aaron’s Painting and Remodeling offers professional vinyl flooring installation services. Our experienced team will ensure a flawless and stress-free installation for your peace of mind.
Conclusion: A Sense of Accomplishment and a Beautiful New Floor
By following these tips, tricks, and techniques, you’ll be well on your way to achieving a professional-looking vinyl flooring installation. The sense of accomplishment you’ll feel upon completion, along with the beauty of your new vinyl floors, will make the entire project worthwhile.
However, if you’d prefer to skip the DIY process and enjoy a stress-free experience, Aaron’s Painting and Remodeling is here to help! Our team of skilled flooring specialists possesses years of experience and utilizes top-of-the-line tools and techniques to ensure a flawless vinyl flooring installation that exceeds your expectations.
Frequently Asked Questions (FAQ)
Q: Is vinyl flooring installation difficult?
A: Vinyl flooring installation can be tackled by DIY enthusiasts with proper preparation and knowledge. However, it does require some time and effort.
Q: What tools do I need for vinyl flooring installation?
A: The basic tools you’ll need include a utility knife, tape measure, straightedge, rubber mallet, and possibly a jigsaw.
Q: Can I install vinyl flooring over existing flooring?
A: In some cases, you may be able to install vinyl flooring over existing laminate or vinyl flooring, as long as the subfloor is level and the existing flooring is in good condition. However, it’s always best to consult with a professional or refer to the manufacturer’s instructions.
Q: How much does professional vinyl flooring installation cost?
A: The cost of professional vinyl flooring installation can vary depending on the size of the space, the type of vinyl flooring chosen, and labor rates in your area. Contact Aaron’s Painting and Remodeling for a free consultation and quote.
We hope this guide has empowered you to approach vinyl flooring installation with confidence. For any further questions or to schedule a professional installation, don’t hesitate to contact Aaron’s Painting and Remodeling. We’re here to help you create beautiful and functional vinyl flooring for your home!